Dvd and Blue Ray Ripper for Smart Tv
Physical media has its time and its place, only in the era of ultra-fast home Wi-Fi and high-res smartphones and tablets, a Blu-Ray or DVD basically makes no sense for a lot of the ways nosotros now consume content. While ripping your collection of discs to digital tin be time-consuming and comes with a existent cost (deejay infinite), going through the problem can get you something Netflix tin can't: permanent, get-anywhere access to your complete media collection that no i can accept away.In this guide, we'll show you lot how to get started ripping your DVDs and Blu-Rays, stripping the DRM protection, and converting them into more space-friendly and watchable formats for all of your devices. As a bonus, we'll bear witness you how to go a media server up and running so you lot can stream those movies from any device, anywhere.
Prepare your setup
There are a few things you lot demand to rip DVDs or Blu-Rays. Get-go, obviously, is a disc bulldoze. If your PC already has a bulldoze, or if you take an external DVD/Blu-Ray drive collecting grit in a closet or drawer, y'all're already 1 footstep ahead!
Not all drives are created equal for ripping, simply the ASUS ZenDrive Silver is a not bad (and affordable) choice for DVDs. Blu-ray drives (which can too read all DVDs) are still significantly more than expensive than DVD drives, peculiarly external USB models — the Pioneer BDR-XD07B is a popular option for ripping, merely it costs around $100. I use the ~$50 LG WH14NS40 for both DVDs and Blu-Rays, and information technology generally works well, but it's an internal drive that only works on desktops with a spare SATA slot.
You lot'll likewise need a off-white amount of deejay infinite, since the ripping procedure involves dumping the contents of a disc onto your PC. DVD movies are unremarkably only a few gigabytes, but Blu-Ray movies can easily take up xx-60GB of space. That'south simply counting the motion-picture show file itself — if you want to shop the bonus content as well, make more than room on your PC.
Rip your discs
At present it's time to start ripping discs. My favorite application for this is MakeMKV, which can create rips from both Blu-Ray discs and DVDs, and is cross-platform. Yous can download the latest version here. The app can be used for free with the official beta central (a new ane is generated each month, so bookmark that), merely if you lot want to back up the projection, y'all tin buy a lifetime fundamental for .
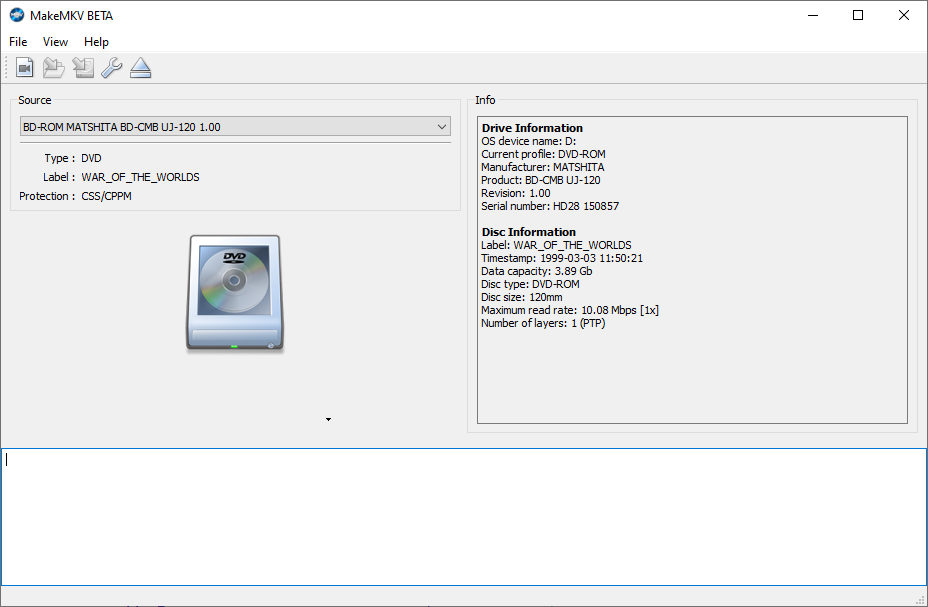
Once you take your drive, plug it into the fastest port on your PC (a blue USB 3.0 connector, in virtually cases), pop in a motion-picture show, and open up up MakeMKV. If you haven't already, get to Help > Annals and enter the latest beta key. If everything is working properly, data about the drive and disc will appear on the right side of the window. Click the big drive push button to browse for content.
Once MakeMKV scans the disc, the contents will be displayed on the left side. Most discs usually have many media files — too the movie itself, the disc can also incorporate bonus content, trailers, card files, and other data. MakeMKV automatically hides content shorter than 120 seconds.
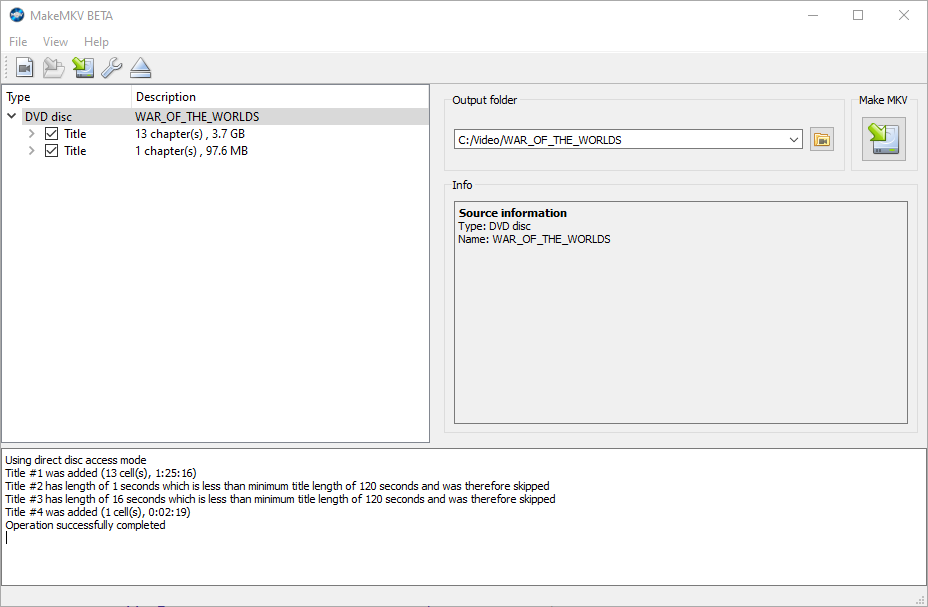
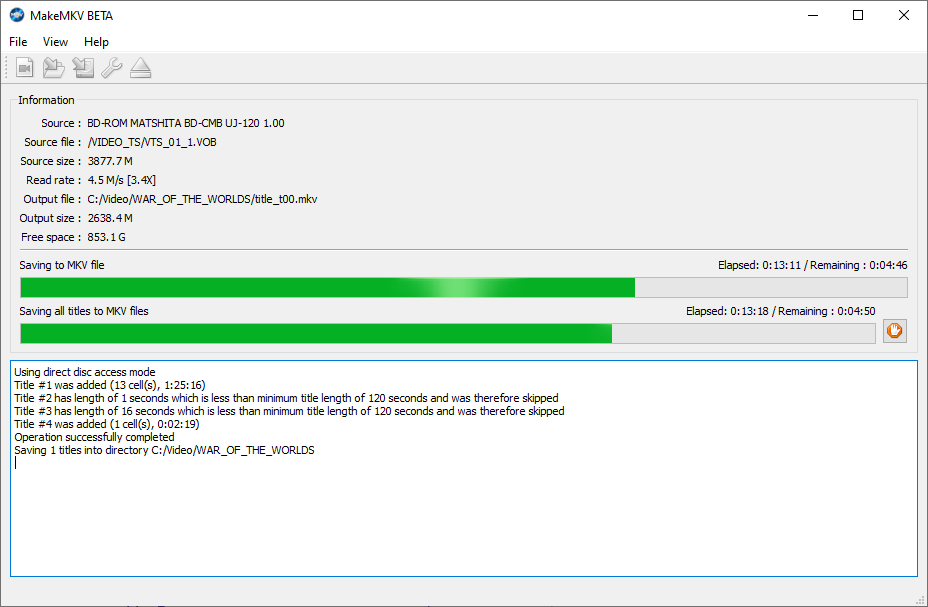
The moving-picture show is usually the largest file, so uncheck all of the others, change the output folder if y'all want, and click the relieve button to get started. You'll probably want to grab a coffee or become other piece of work done while MakeMKV does its thing — depending on the speed of your PC and bulldoze, it can accept a while.
Once it's done, try opening the file and see if it works. Yous may need VLC Media Player to test information technology out, depending on the video and sound codecs being used. All the subtitle and audio tracks from the original movie should be present, unless you deselected them from MakeMKV.
Convert your moving picture
MakeMKV stores ripped movies in the aforementioned format and pinch level as they are on the disc, which commonly means large file sizes. That's why information technology's a adept idea to catechumen the ripped MKV file to a more mutual video format — more of your devices will exist able to play it, and information technology won't take up as much disk space.
There are dozens of applications for converting video, but my favorite is HandBrake. It'southward completely free, works on all major desktop platforms, and has dozens of presets for popular formats and devices. Converting a ripped movie to a more than manageable compressed video file only takes a few clicks.
In one case you install Handbrake, open it and select the MKV file of your pic. Handbrake offers a ton of options for customizing the video and audio format, only it's probably best to use the 'Fast 1080p30' preset. If it's not selected automatically, click the Presets dropdown menu and pick General > Fast 1080p30.
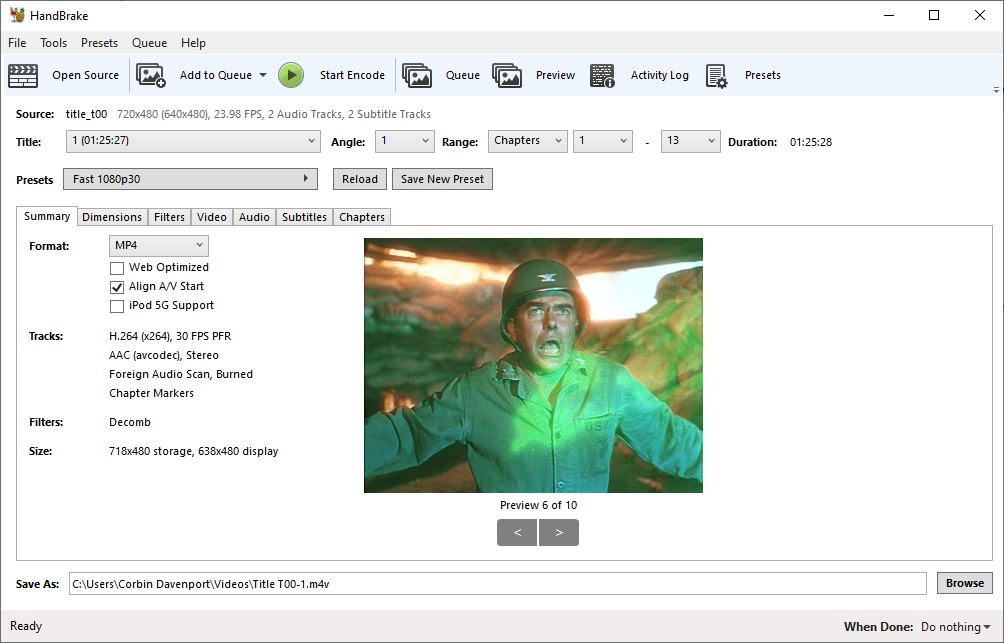
Once you're prepare, click the 'Kickoff Encode' button and let Handbrake do its matter. Just similar MakeMKV, the speed depends on the length of the picture and how fast your PC is — converting a DVD version of the 85-minute War of the Worlds on my Ryzen v PC took around 10 minutes.
The encoding process volition also consume upward all of your CPU cycles, so it'southward all-time to leave your reckoner alone during this footstep. If you're doing this on a laptop, make sure to set it on a table or elevated surface where the fans aren't blocked. Otherwise, your CPU could tiresome down to reduce temperatures, making the procedure take even longer.
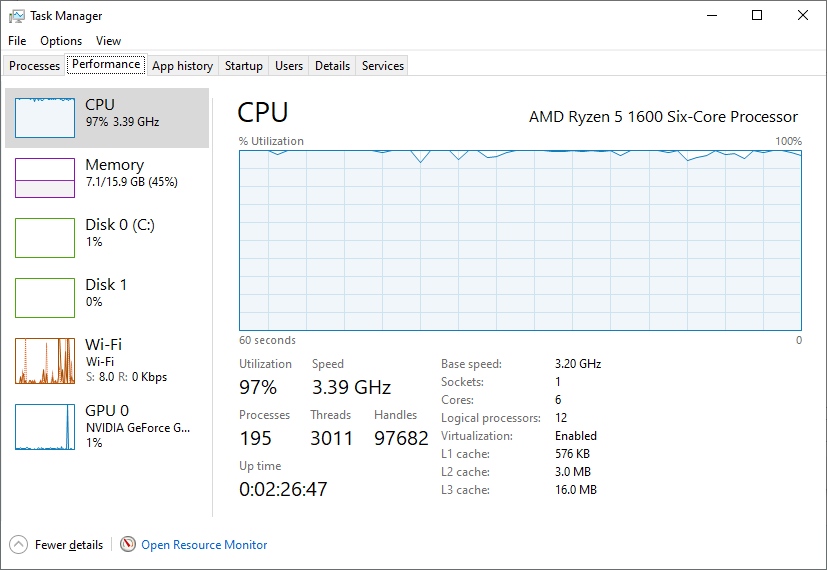
Encoding video pushes most CPUs to their limit
When the conversion is complete, yous'll finally have a copy of your movie that is playable on just about whatever figurer, phone, tablet, or Idiot box! You tin can obviously stop reading right hither, and just copy the file manually to the devices you want to watch the content on, but we're also going to cover applications that make it piece of cake to stream your content to other devices.
Streaming to other devices
Simply copying your film files to each of your devices does work, but there are applications that allow you lot stream content on-demand to other devices on your own network with a Netflix-manner interface. The two most popular options for this are Kodi (formerly XBMC) and Plex Media Server.
Plex is my personal favorite of the 2. Once you install the Plex Media Server on a spare PC (or Nvidia Shield, or NAS, or Raspberry Pi) and point information technology at your movies folder, it can stream that content to any other devices continued with the same Plex business relationship. If your server has enough power for video encoding, Plex can fifty-fifty convert movies to dissimilar quality settings. Also, saving movies to sentinel offline your phone or tablet just takes i tap, and it'due south easy to set upward admission exterior your local network.
Kodi is an open-source media center application, with plug-ins bachelor for playing content from a broad diverseness of platforms and services. Once you fix a server for your movies, any other devices on your local network with Kodi installed can play the content.
Pricing is likewise an important cistron. Plex allows you to create a server and watch content from it with the spider web app (or TV apps) for free, but if you want to lookout man your movies using the mobile Android or iOS apps, y'all'll have to pay an in-app purchase for each device. There'south likewise a Plex Pass subscription, which removes the demand for the in-app purchases and unlocks other features. By comparing, Kodi is completely free (and open-source), but it's not as seamless of an experience as Plex.
Of form, once you lot accept a collection of movie files, you can use whatever software you want and endeavor out something dissimilar whenever yous want. That'southward the advantage of owning your own content without whatsoever pesky DRM.
Organizing your files
Plex and Kodi can add movie posters and other data to your content, but but if you name your files in a fashion the applications can empathise. This is fairly unproblematic for movies: use the title of the picture, followed by the year information technology was released. Something like The Avengers (2012) or Zootopia (2016) volition usually work.
Idiot box prove organization is a bit more complicated, every bit the files usually have to be separated into folders based on the season. See Kodi'southward and Plex's guides for more than data.
Kodi setup
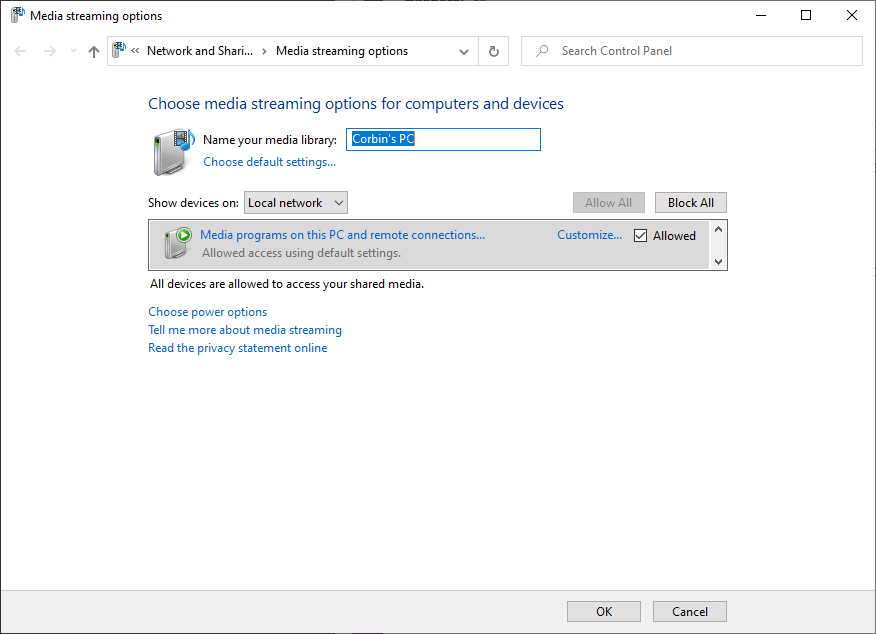
While Kodi is primarily designed for playing locally-stored content, it can connect to and play content from network drives. The get-go step is to fix up a DLNA server on your PC, which will allow let other devices stream content from your PC. This works with more than but Kodi, also: Roku devices, the PlayStation iii, various smart TVs, the Xbox One, and plenty of other devices can play content from DLNA servers without any additional software.
Windows 7 and later have a DLNA server built-in — just search for the 'Media streaming options' control panel in the Starting time Carte du jour and click the 'Turn on media streaming' push button.
If you lot don't want to requite media players access to your unabridged PC'due south media library, or if y'all're non on Windows, you should requite Universal Media Server a try. Kodi likewise supports connecting to SMB shares (e.m. shared network folders on Windows), but simply when Kodi is running on a Windows device.
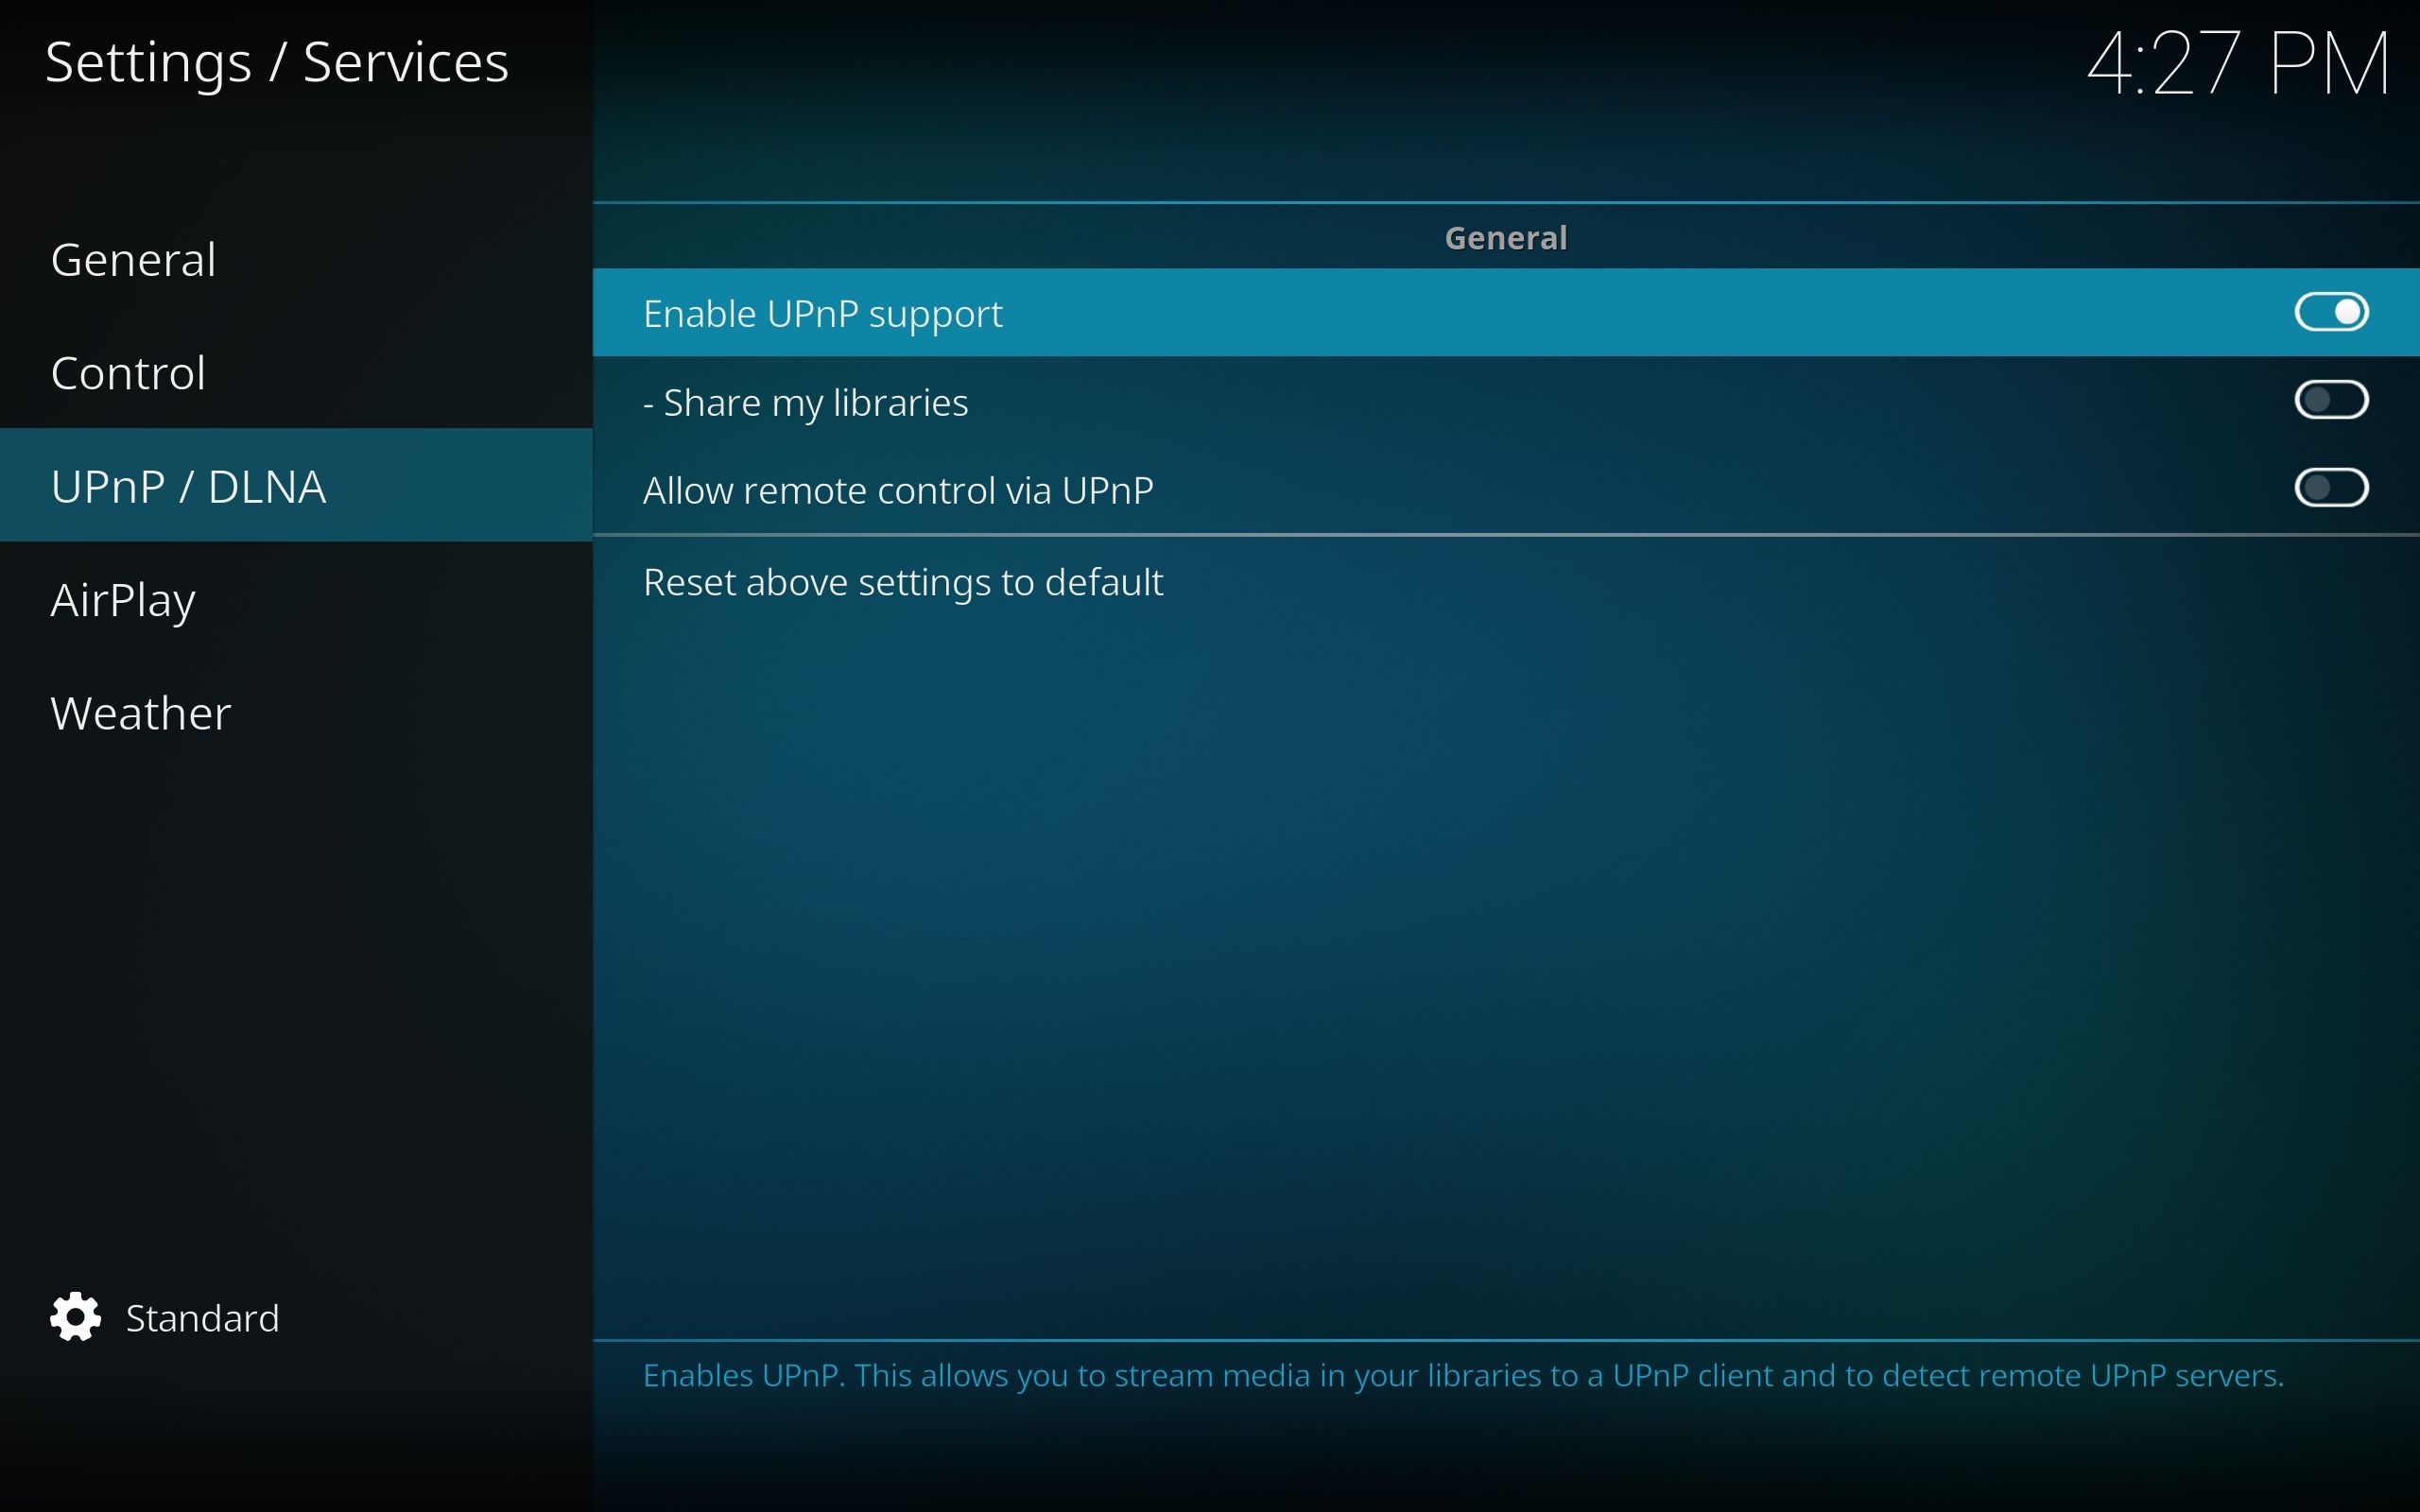
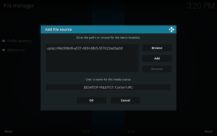
Now it's time to add the server as a media source in Kodi. You have to exercise this for each device you fix Kodi upwardly on, merely the procedure doesn't take long. Get-go, we have to enable DLNA server support in Kodi:
- Press the Settings button in Kodi. By default, the push button should be a gear icon at the top-left.
- Select 'Services,' then 'UPnP/DLNA' on the sidebar.
- Ready 'Enable UPnP support' to on.
At present add your server equally a media source in Kodi:
- Select 'Movies' from the main menu in Kodi
- Select 'Add videos..,' then 'Scan.'
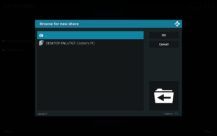
- Tap 'UPnP devices,' expect for your PC to show upwards in the list, then tap information technology.
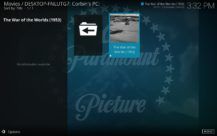
- Scan to the location where your movies are stored. Because I stored my files in a 'Movies' folder in my Windows Videos directory, I selected Videos > Folders > Videos > Movies. In one case yous have the right directory selected, press the OK push.
- Finally, press OK to add the source.
Your PC'due south movie folder volition at present announced as a media source in Kodi! Pat yourself on the back.
Plex setup
If you want to set up Plex, it only takes a few minutes. First, create a Plex account if you haven't already, and so download Plex Media Server on your PC. The install process varies by platform, but on Windows, the installer does all the work for you. One time the server is running, it volition open the web interface in your browser (if not, right-click on the Plex icon in your taskbar and select 'Open Plex').
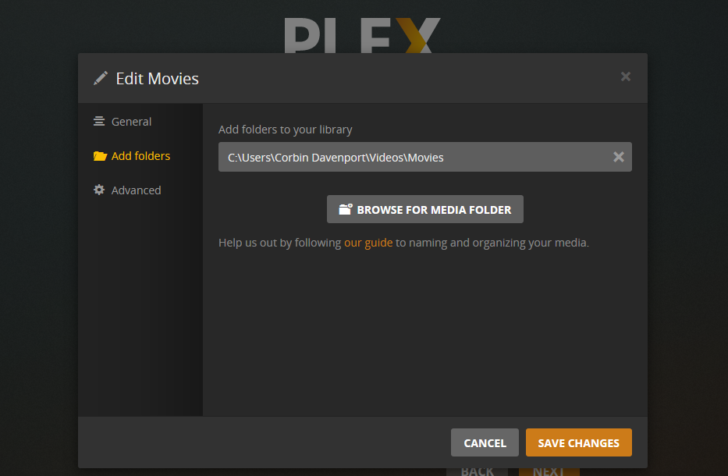
The web interface will walk you through the procedure of logging in and calculation media libraries. After that, your content volition appear on whatever device logged into the same Plex account. On mobile devices, there will even exist a download button you can use to salvage the flick for offline viewing , with multiple quality options available.
Plex is an incredibly versatile slice of software, and then once you take some time to kill, I recommend going through the app and server settings and seeing what it tin can practice. In addition to movies, Plex also supports TV shows, music storage (which I use well-nigh every day), photograph backups from mobile devices, and much more. Plex even offers a collection of free movies and Goggle box shows, on top of whatever content y'all've added yourself.
Source: https://www.androidpolice.com/2020/07/11/how-to-rip-your-movie-collection-to-watch-anywhere/